


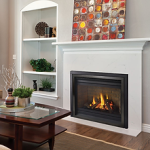
Why Prep Work Makes or Breaks Any Paint Job
Here’s the thing about painting that most people don’t realize — the actual painting part is probably the easiest step. What really separates a paint job that lasts from one that peels in two years? It’s everything that happens before the brush ever touches the wall.
I’ve seen homeowners get frustrated when they watch painters spend an entire day just getting surfaces ready. But trust me, that time spent prepping is worth every minute. Skip these steps and you’re basically throwing money at a problem that’ll come right back.
Whether you’re tackling a DIY project or hiring Professional Painters in Smyrna TN, understanding these preparation fundamentals helps you recognize quality work. And honestly? It might save you from making some pretty expensive mistakes.
Step 1: Thorough Surface Cleaning
Dirt, dust, grease, mildew — these are paint’s worst enemies. You can’t just slap new paint over grime and expect it to stick. It won’t. The paint needs something clean to bond with.
For exteriors, this usually means power washing. But not the aggressive kind that damages siding. A controlled wash removes years of buildup without gouging the surface. Interior walls need washing too, especially in kitchens where grease splatters accumulate and bathrooms where moisture creates film.
Expert Painters in Smyrna TN know that skipping this step is basically guaranteeing callbacks and touch-ups later. Clean surfaces aren’t negotiable.
What to Look For
- Walls should be completely dry before any other prep begins
- Mildew spots need treatment with specialized solutions, not just soap
- Glossy surfaces require light sanding after cleaning to help paint grip
Step 2: Scraping Loose and Flaking Paint
Old paint that’s peeling? It’s got to go. Painting over flaky sections just creates a sandwich of failure — new paint bonded to old paint that’s already letting go of the surface underneath.
Good scrapers work methodically across every surface. They’re looking for bubbles, cracks, chips, anything that moves when you press on it. This part takes patience. Rushing through scraping means problems show up about six months down the road.
Some spots need heat guns to soften stubborn layers. Others come off with simple hand scraping. The goal is getting down to paint that’s actually bonded to the substrate.
Step 3: Sanding for Proper Adhesion
Sanding does two things. It smooths out rough edges left from scraping and creates tiny grooves that give new paint something to grab onto. Think of it like Velcro — smooth surfaces don’t stick well to each other.
According to painting industry standards, proper surface preparation including sanding significantly extends the life of any paint application.
Different surfaces need different approaches:
- Wood trim gets fine-grit sandpaper to smooth without removing too much material
- Previously glossy walls need medium-grit to break the shine
- Patched areas require feathering edges so they blend invisibly
Step 4: Filling Holes, Cracks, and Damage
Every nail hole, every crack, every dent — they all need attention. And not just a quick dab of spackle. Professional filling means matching the right product to the damage type.
Small nail holes? Lightweight spackle works fine. Deeper holes or damaged wood? That’s wood filler territory. Cracks in drywall? Those might need mesh tape and joint compound to prevent them from returning.
For homeowners seeking quality results, Innovations Painting LLC recommends allowing adequate drying time between fill applications and final sanding. Rushing this step shows in the finished product.
Common Repair Areas
- Nail pops in drywall ceilings
- Corner dents from furniture bumps
- Hairline cracks around door and window frames
- Gaps where trim meets walls
Step 5: Caulking Gaps and Seams
Caulk is kind of the unsung hero of paint prep. Those gaps between trim and walls? Between window frames and siding? They need sealing before paint goes on.
Good caulk work serves double duty. It creates clean visual lines where surfaces meet, and it prevents moisture intrusion that causes paint failure from behind. Water getting into gaps is how you end up with peeling paint even when the surface prep was otherwise perfect.
Expert Painters in Smyrna TN apply caulk in thin, consistent beads and tool them smooth before they skin over. Thick globs that shrink as they dry? That’s amateur hour.
Step 6: Applying the Right Primer
Primer isn’t just watered-down paint. It’s a completely different product designed for adhesion and stain-blocking. Using the wrong primer — or skipping it entirely — undermines everything else you’ve done.
Different situations call for different primers:
- Bare wood needs oil-based or shellac primer to seal tannins
- Water stains require stain-blocking primer or they’ll bleed through
- New drywall patches absorb paint differently without primer to equalize
- Dramatic color changes need tinted primer to reduce topcoat layers
Spot-priming repaired areas is minimum. Full primer coats on surfaces that need them aren’t optional extras — they’re what makes the topcoat perform.
Step 7: Protecting Surrounding Areas
Drop cloths, plastic sheeting, painter’s tape — protection prep seems basic but it’s actually pretty involved when done right. You want to learn more about how professionals approach this systematically.
Tape goes down in specific order with specific techniques. Edges get pressed firmly to prevent bleed-under. Plastic covers furniture and floors completely, secured so it won’t shift during work. Exterior projects need landscaping protection from power washing and paint drips.
This step also includes removing switch plates, outlet covers, light fixtures, and hardware. Painting around these things never looks as clean as painting with them removed.
Step 8: Final Inspection Before Paint
Professional Painters in Smyrna TN do a complete walkthrough before opening any paint cans. They’re checking that every previous step actually got completed. Missed spots happen — the goal is catching them now, not after you’re two coats deep.
This inspection includes:
- Running hands across surfaces to feel for rough patches
- Checking filled areas after they’ve fully dried
- Verifying all caulk lines are smooth and complete
- Confirming primer coverage in all required areas
- Double-checking protection placement
So yeah, actual painting might only take a day or two. But the prep work leading up to it? That’s where quality really lives.
Frequently Asked Questions
How long does paint preparation typically take?
Prep time varies wildly based on surface condition. A room in good shape might need just a few hours. Exterior surfaces with significant peeling or damage can require several days of prep before painting begins. Generally, expect preparation to take at least as long as the actual painting.
Can I skip priming if my walls are already painted?
Sometimes, but not always. If you’re painting similar colors over paint in good condition, you might skip full priming. But repaired areas, stains, bare spots, and dramatic color changes all need primer. Skipping it in these situations causes visible problems.
Why do professionals spend so much time on preparation?
Paint adhesion and longevity depend almost entirely on what’s underneath it. Rushing prep to start painting faster just means the job fails faster. Callbacks, touch-ups, and early repainting cost more than doing thorough prep once.
What happens if surfaces aren’t cleaned before painting?
Paint applied over dirt, grease, or mildew won’t bond properly. You’ll see peeling, bubbling, and adhesion failure — sometimes within months. The new paint is essentially stuck to the contamination layer, not the actual surface.
Should I do prep work myself before painters arrive?
Talk to your painters first. Some appreciate cleaned and cleared rooms. Others prefer handling all prep themselves to ensure it meets their standards. Moving furniture out definitely helps, but leave surface preparation to the professionals unless they specifically request otherwise.


Leave a comment