


Remodeling a tired bathroom can feel scary, yet it should feel thrilling too. First, remember that every lovely bathroom remodel began as a small idea. Imagine then that each morning you are greeted by warm lights, new tile, and convenient storage. Because the goal of “how to remodel a bathroom? “is possible, we will break it into simple steps. You will learn smart tips, avoid big costs, and keep stress low. Furthermore, we will use clear words so grade-school readers can follow along. Finally, grab a notepad, open your favorite design site, and let us walk through the journey together. After these pages, you will trust the path and enjoy each hammer swing.
1. Planning & Budgeting
Planning decides success, and budgeting guards your wallet. This stage may feel dull, yet it saves time, cash, and nerves later.
List Your Daily Problems
First, note why you need a bathroom renovation. Maybe the shower leaks. Storage space might be limited. Furthermore, slippery floors scare kids. Write every gripe. Because you can see pain points on paper, you can solve them with clear fixes.
“A problem well stated is a problem half solved.” — Charles Kettering
Measure Everything
Next, grab a tape. Measure walls, windows, the ceiling, and door swing. Then sketch a floor plan. Keep lines straight and labels neat. When numbers guide choices, new fixtures will fit the first time.
Set Smart Goals
Now turn problems into goals. For example:
- Add a wider doorway for wheelchair access.
- Replace the tub with a walk-in shower.
- Install brighter LED lights above the mirror.
Goals must be clear, short, and doable within your space.
Draft a Realistic Budget
Money matters. Because costs vary, break spending into groups. The table below shows average shares for a mid-range for how to remodel a bathroom?
| Budget Part | % of Total | Quick Notes |
| Labor | 35 % | Skilled help speeds work |
| Fixtures | 20 % | Toilet, sink, shower |
| Surfaces | 15 % | Tile, paint, counters |
| Cabinets | 10 % | Vanity, shelves |
| Plumbing | 8 % | Pipes, valves |
| Electrical | 5 % | Lights, fans |
| Safety Net | 7 % | Hidden rot, code flips |
Always keep the “Safety Net.” Because unseen issues often arise from old walls, aim for a minimum of 10% if the house was built before 1990.
Explore Funding Options
Then choose how to pay. You might use savings. Furthermore, look at home-improvement loans or a simple credit line. However, avoid high-rate cards. Interest can eat Project Joy fast.
Check Local Codes and Permits
Before swinging a hammer, call the city office. Because most towns need permits for plumbing moves, ignoring rules can lead to fines. Moreover, buyers may ask for proof later. Getting papers early keeps resale value high.
Build a Timeline
Time can cost as much as tile. First, mark big dates: demo start, inspection windows, and final paint. Please include delivery times for special items, as some vanity tops may require up to eight weeks. Furthermore, remember holidays can slow shipping. A clear timeline keeps everyone calm.
Choose Your Team
Some tasks are safe DIY, like painting or hardware. However, moving a sewer line requires a professional. Therefore:
- Collect at least three bids.
- Check licenses and past work photos.
- Ask for written scopes with milestone payments.
Never hand over more than 10 % upfront. To ensure fairness for both parties, please make sure to uphold these terms.
Plan Waste Removal
Debris piles up fast. Renting a small dumpster early keeps the driveway clear. Furthermore, donate reusable pieces—old mirrors and light fixtures help others and lower landfill weight.
Stay Flexible
Finally, expect small twists. Tile colors can change in real light. A hidden pipe may block a niche. However, because you built a safety net, such surprises will not sink morale. Breathe, adjust, and move forward.
Quick Facts to Remember
- Average U.S. bathroom remodel cost: $11,000–$27,000 (Remodeling Magazine, 2024).
- Water-saving toilets cut usage by 20 % (EPA WaterSense).
- Proper vent fans should move 1 CFM per square foot of floor area.
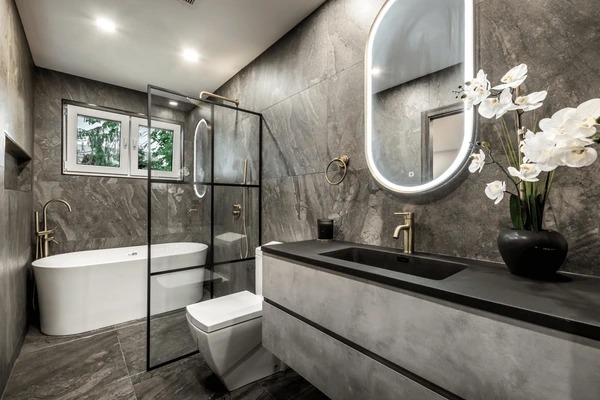
2. Design & Layout Decisions
First, excellent design starts with clear flow. When you open the door, you should step into open space, not bump a vanity. Bathroom remodel studies indicate that 40% of owners’ experience regret over tight walkways, so it is advisable to address this early.
Check the Footprint
- Trace traffic paths. Walk from the sink to the shower. Are moves smooth?
- Mark obstructions. Note the radiators, low windows, and vents.
- Shift wisely. Moving a drain costs about $1,000. However, if you slide a door with two studs remaining, you could potentially free up three extra feet.
“A few inches gained in planning saves miles of frustration later.”
Pick a Style Theme
Next, choose a mood board. Maybe you love coastal calm with pale blues. Or you prefer sleek black fixtures against white tile. Either way, keep tones and metals consistent. Because mixed metals can clash, limit yourself to a maximum of two finishes.
Layer the Light
Proper light cuts shadows and lifts mood. Add three layers:
- The ambient ceiling LED illuminates the entire room. It brightens the whole room.
- Task sconces are at eye level. They ease shaving and makeup.
- The accent strips are situated beneath a floating vanity. This soft glow guides sleepy feet at night.
The U.S. DOE notes that LEDs use 75 % less energy and last 25 times longer than bulbs from 20 years ago. Therefore, upgrades pay back fast.
Maximize Storage
Small baths need smart nooks. Try these ideas:
- Recess a medicine cabinet between studs.
- Slide-out shelves under the sink keep cleaners tidy.
- Tall, narrow towers beside the mirror hold rolled towels.
Because clutter steals peace, hidden spots matter.
Ventilate Well
Steam breeds mold in 48 hours. Add a fan rated 1 CFM per square foot. Place it above the shower and run it for 20 minutes after use. In addition, the duct is straight outside. This step prevents damp attic air.
Plan for Safety
While you design the style, also add grab-bar blocking in the walls. Later, you can screw bars into solid wood without opening tile. The CDC says slips cause 235,000 bathroom injuries yearly. Simple wood blocks can reduce that risk.
Practical Example
Imagine a 5 × 8 bath. You flip the tub to a shower against the far wall. You slide the toilet six inches toward the window. Then you install a pocket door. Now two people can move without collision, and you gain space for a 30-inch vanity.
Quick Tips
- Use a clear glass panel, not a curtain, to stretch sight lines.
- Float the vanity six inches above the floor; your eye reads extra space.
- Mirror a full wall; reflections double light.
3. Materials & Fixture Selection
Now that the map is clear, you will fill it with tough, good-looking parts. Choose each item for moisture, wear, and easy care. Additionally, please adhere to your established budget.
Durable Flooring Choices
First, pick porcelain tile. It absorbs less than 0.5 % water and scrubs off scratches. Large-format tiles mean fewer grout lines to clean. If feet crave warmth, add an electric mat beneath. EnergyStar data shows heated floors use about 1 cent per square foot per hour.
Shower and Tub Surfaces
Next, line wet walls with cement backer board. Then brush on a waterproof membrane. Tile over that layer. For grout, use a mixed stain-resistant type. Because mold likes porous joints, this recipe keeps black spots away.
Countertops that Last
Engineered quartz remains king. It rates 7 on the Mohs hardness scale, resists stains, and needs no sealing. Moreover, a simple soap wipe maintains its shine. For tight budgets, high-pressure laminate mimics stone at 40 % less cost.
Water-Saving Fixtures
Choose a Water Sense toilet using 1.28 gpf. The EPA says this swap saves a family 13,000 gallons per year. Pair it with a dual-mode flush button for even finer control. Next, grab a pressure-balanced shower valve. It stops scalding when someone flushes elsewhere.
| Fixture | Water Use Old | Water Use New | Annual Savings |
| Toilet | 3.5 gpf | 1.28 gpf | 13 k gal |
| Showerhead | 2.5 gpm | 1.8 gpm | 2 k gal |
Cabinet Choices
Moist air swells cheap particleboard. Instead, buy plywood boxes with sealed edges. Add soft-close hinges; they extend life by absorbing slam shock. If floor space is tight, select a wall-hung vanity and stash baskets below.
Waterproofing Musts
Never skip a waterproof layer. Liquid membranes roll on like paint and dry to a rubber skin. Flood-test the pan for 24 hours. Please address any leaks now to prevent potential ceiling damage in the future.
Practical Example
Mark buys subway tile at $2 per square foot and splurges on a glass mosaic strip at $12. Because the accent only covers 10 linear feet, the whole wall still costs less than all-mosaic. Thus, style meets budget.
Handy Tips
- Order trim pieces with tile; color runs can vary in later batches.
- Store grout indoors; cold garages weaken its set.
- Seal natural stone yearly; calendar a reminder in your phone.
Key Stats Round-Up
- Quartz tops hold 90 % stone chips plus 10 % resin.
- Slip-resistant tile scores ≥ 0.42 on the DCOF test.
- Soft-close hinges endure 80,000 open-close cycles.
Because thoughtful material selection defends against leaks, stains, and wear, your new bathroom renovation will sparkle today and stay sturdy for years to come. Please number your plan and adhere to it.
Before any hammer swings, turn off water and power. Next, label each valve and breaker. Because clear labels prevent mistakes, you save time later. Also, wear goggles, gloves, and stout boots. The CDC notes that sharp debris causes 37 % of injuries during the cases of “how to remodel a bathroom?” each year.
4. Protect the Rest of the House
Dust travels fast. Therefore, tape plastic sheets over doors and vents. After that, lay heavy paper on floors to shield wood from stray nails. Open one window and place a box fan facing out. This setup pulls fine dust outside, so cleanup stays simple.
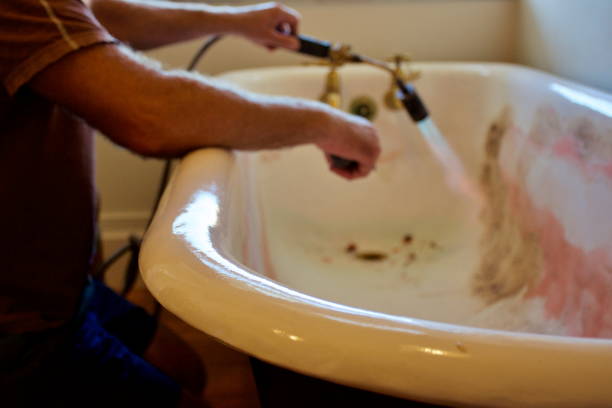
Step-by-Step Demo
“Take it apart as carefully as you plan to build it.”
- Remove mirrors and lights first. Loosen hidden screws rather than prying glass.
- Shut off fixture valves, then drain and cap lines.
- Unscrew the toilet and plug the drain with a rag.
- Score caulk lines, then lift out the vanity in one piece. You may donate usable parts.
- Chip tile from top to bottom because shards fly, keep a tarp handy for quick sweeps.
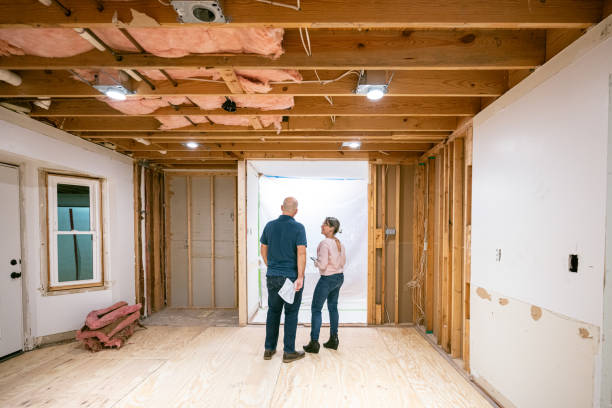
Mind Structural Surprises
Walls open; scan studs for mold, rot, or wiring damage. Use a moisture meter. Readings above 16 % signal trouble. According to HUD studies, 20 % of older baths hide wet wood. Replace any soft studs and sister joists if they sag more than a quarter inch.
Upgrade Behind-the-Scenes Systems
Now is the time to modernize pipes and wires. Swap old steel lines for PEX. This step cuts leak odds by 50 % over the next decade. Also, install a new 20-amp GFCI circuit. Home inspectors flag missing GFCI outlets in 80 % of failed sales, so stay ahead.
Add Future-Proof Blocking
While studs are bare, screw 2 × 10 blocks at grab-bar height and shower-door hinges. Even if you skip bars now, you will thank yourself later. Seniors sustain 235,000 bath falls yearly, yet secure bars reduce injury risk by 31 %.
Inspections Matter
Call the building office for rough checks. Inspectors look at pipe slope, wire gauges, and vent paths. Passing now avoids costly tear-outs later.
Clean and Prep
Finally, vacuum every cavity and wipe surfaces with a damp cloth. Because adhesive bonds best on dust-free wood, this step boosts tile life. Spray a mold inhibitor on fresh studs, then let them dry overnight.
Pro Tips
- Score tile grout with a utility knife; it pops off cleaner.
- Rent a small dumpster early so debris never blocks work paths.
- Keep a photo log of hidden lines; phones store maps for future repairs.
With careful prep, your bathroom renovation site is safe, clean, and ready for the fun part—building it back better.
5. Installation Stage
Build the Waterproof Shell
First, hang cement backer board on all wet walls. Use corrosion-proof screws every eight inches. Then, roll on a liquid membrane. Because water sneaks through gaps, overlap coats by three inches. Flood-test the pan for 24 hours. This simple test prevents ceiling stains that ruin family dinners later.
Lay the Floor
Spread thin-set mortar and comb straight lines. Next, back-butter large tiles so voids vanish. To achieve even joints, use tile spacers. The Tile Council of North America reports that, in fact, back-buttering cuts hollow spots by 90%. Once the tiles are set, proceed to grout using a stain-proof blend. Wipe away the haze within 30 minutes; however, the dried film can be quite stubborn.
Set the Vanity
Slide the cabinet into place and shim until level. Secure it to studs with two-and-a-half-inch screws. Then, drop in the quartz top at the edges with silicone. Because silicone flexes, it survives small house shifts without cracking.
Hook Up Plumbing
First, install the faucets; then, proceed to install the trap arms. When wrapping threads, be sure to use Teflon tape, and always turn it clockwise. First, reconnect the supply lines. Then, proceed to open the valves slowly. Be sure to watch every joint. Indeed, even tiny drips can waste as much as 3,000 gallons yearly, according to the EPA.
Mount the Toilet
Press a fresh wax ring to the flange. Lower the bowl squarely, then tighten the nuts evenly. Rocking breaks seals, so test stability by sitting gently. Finally, connect the tank hose and flush twice while scanning for leaks.
Trim the Electrical
First, attach the GFCI outlets; then, proceed to install the vanity lights. Finally, don’t forget to attach the vent-fan grill. When choosing LED lamps, opt for those rated 90 + CRI; in doing so, you will ensure they show true skin tones. Because LEDs sip power, they slash lighting energy by 75 %.
Seal Every Joint
Run silicone where tile meets tub, wall, or floor. Smooth beads with a damp finger for a neat line. Cure time is 24 hours, so keep kids out until tomorrow morning.
Add Accessories
Drill into the blocking you installed earlier. First, hang towel bars at a height of 48 inches. Next, place robe hooks near the shower. Finally, position the toilet-paper holder 8 inches in front of the bowl. In order to maintain a unified style, align the metal finishes.
Perform Final Checks
Run hot water for five minutes. Steam should clear within 20 minutes if the fan works right. Also, flip the breaker to ensure GFCI trips and resets. Open and close every drawer. Soft-close glides should silence slams.
Quick Tips
- Keep grout sealer on hand; apply it after 72 hours.
- Use painter’s tape to mark stud centers before covering them; screws find wood fast.
- Store spare tiles in a closet; color lots change over time.
By taking patient, ordered steps, your query to “how to remodel a bathroom?” transitions from a messy shell to a bright retreat. Moreover, solid work now translates to long years of steamy showers without a single drip.
6. Finishing Touches & Maintenance
A strong finish makes all the work shine. Because last steps lock in beauty and guard your investment, give them time and care.
Seal and Protect
First, seal every joint where two surfaces meet. Run a smooth bead of silicone along the tub edge, sink backsplash, and floor base. Then, wipe the bead with a damp finger for a clean line. This simple job blocks water and mold. The EPA warns that unchecked moisture invites spores within 24 hours, so stay ahead.
Next, open the grout sealer and brush it along every tile joint. Let it soak for ten minutes, then buff the haze away. Reapply after a day. Because sealed grout repels spills, stains now rinse off with mild soap.
Tip: Schedule a yearly reminder on your phone. Re-sealing once each spring keeps tile bright for decades.
Light and Mirror Magic
Good light flatters skin and boosts mood. Therefore, twist in high-CRI LED bulbs. They true colors and cut power use by 75 %.
After that, hang the mirror level at eye height. When the room feels small, you might want to consider choosing a wall-to-wall mirror. Reflections, consequently, double visual space without the need to rip walls out. Are you, perhaps, looking for hotel charm? To begin with, backlight the glass using an LED strip. GA glow, consequently, guides sleepy feet during the night.
“Light shapes how we see a space more than color does.”
Accessorize with Purpose
Accessories, in fact, finish the bathroom remodel just as jewelry completes an outfit. However, too many pieces can lead to clutter. So, choose quality rather than quantity.
- Towel bars: Mount at 48 inches. Linens dry faster there.
- Robe hooks: Place near the shower exit to stop puddles.
- Toilet-paper holder: Center it eight inches before the bowl for easy reach.
Because you added wood blocking earlier, each screw now bites solid lumber. No wall anchors needed.
Soft Details that Wow
Roll out plush, quick-dry rugs. The soak-up drips; consequently, it stops slippery feet. Choose machine-washable types so cleanup stays simple.
Then, fold towels hotel-style. Stack whites to create a spa feel; alternatively, mix gentle pastels for a playful energy. Small color pops pull the eye and cost pennies to swap when trends shift.
Bring in Green Life
Plants, in fact, love steamy rooms. Spider plants, on the one hand, thrive on humidity; meanwhile, pothos and peace lilies also flourish in similar conditions and, in addition, filter air effectively. NASA studies indicate that pothos effectively reduces airborne toxins by 60% in closed spaces. Place one on a floating shelf, but leave sink counters clear to keep mornings stress-free.
Final Quality Check
Now test everything.
- Run hot water for five minutes. Steam should leave within fifteen minutes if the fan works right.
- Flush the toilet ten times. Watch for silent leaks inside the bowl.
- Open and close each drawer. Soft-close slides must glide, not catch.
- Flip the GFCI breaker. It should trip and reset in two pushes.
Because you catch flaws early, warranties cover fixes without debate.
Smart Cleaning Habits
Daily habits, in fact, guard the fresh look. To prevent water spots, make sure to squeegee the glass doors after every shower. Additionally, wipe faucet bases with a soft cloth in order to banish calcium rings.
Each week, it is important to spray the tile with a pH-neutral cleaner. It is advisable to avoid harsh bleach; indeed, it erodes grout. In busy homes, it is true that quick wipes are, in fact, preferable to marathon scrubs. According to the American Cleaning Institute, it is noteworthy that, in fact, five-minute daily tidies can, in turn, significantly cut deep-clean time by 40%.
Long-Term Care Plan
Create a calendar.
- Every six months: Replace vent-fan filter, wash shower curtain, and tighten loose screw Reseal
- Seal grout, check caulk, and inspect supply hoses for bulges.
- Every five years: Repaint walls with mildew-resistant satin paint. Touch-up color renews walls and seals tiny cracks.
Because a written plan removes guesswork, you stay ahead of wear. According to Zillow data, well-kept baths can add up to 10% in resale value, whereas neglected ones do not contribute similarly.
Practical Example
Laura finished her bathroom renovation last fall. She sets a 15-minute timer every Sunday. During that slot, she dries mirrors, wipes counters, and shakes rugs outdoors. Her grout still looks new, and she has avoided costly deep cleans. Tiny routines save her two hours each month.
Quick Recap Nuggets
- Seal joints, seal grout, and stop leaks.
- Layer light, mirror wide, brighten mood.
- Mount accessories on blocking for strength.
- Use plants for air and cheer.
- Check the fan, GFCI, and drawers before declaring it done.
- Adopt five-minute daily wipes for lasting sparkle.
Because finishing touches blend art with science, your polished bathroom redesign now welcomes you with warmth and safety every single day. By maintaining it with small, regular acts, you will find that the space rewards you with beauty and peace for decades.
Bright Finish: Refresh Daily, Smile Always.
The final step to “how to remodel a bathroom?” feels sweet. Your once dull room now shines with calm light, tidy lines, and air that smells clean. To begin with, examine each updated part carefully, and keep in mind the plan that guided the placement of every screw. Next, take pride in smart budget moves that guarded cash while boosting value.
Then breathe easy, because hidden pipes and wires now meet code and carry water and power like champs. Also, enjoy wide walkways and shelves that hold every towel, razor, and toy. Since you sealed grout vents to pull steam fast, mold has no place to grow. Finally, share the win. Take before-and-or-after photos, teach friends simple tricks, and pass on tools to the next dreamer. Keep a chore care list on the fridge. Wipe glass after showers, run fans, and re-seal grout each spring; the job stays new. If a knob feels loose, tighten it that day. Small acts beat big repairs. In short, you transformed wishes into actions, actions into changes, and changes into daily comforts. First, step in; then, switch on the soft lights, and finally, let warm water fall. Delight in your forever-fresh, skillfully crafted, heart-happy bathroom remodel. Tomorrow, you will wake up smiling in your new spa.


Leave a comment